- WTClass Student Help Home
- Login Help
- Assignments
- Tests and Quizzes
- My Grades
- Community Tools
- Media
- Other
- Technical Help
- Technology Support Portal
![]()
Community Tools
Community Tools
Discussion Board Topics
- How to Access the Discussion Board
- Views: List and Tree View
- Create a Discussion Post
- Replying to a Discussion Post
- View Discussion Board Grades
- Can't Find Your Discussion Post?
- Sharing a Video Using OneDrive
Videos
Discussions
The discussion board is a tool for sharing thoughts and ideas about class materials. Course members can replicate the robust discussions that take place in the traditional classroom. An advantage of using the discussion board is its asynchronous nature. Participants do not need to be in the same location or time zone, and can take time to consider their responses carefully.
You can use the discussion board to:
- Meet with your peers for collaboration and social interaction.
- Pose questions about homework assignments, readings, and course content.
- Demonstrate the understanding or application of course material.
How to Access the Discussion Board
- On the course menu, click Tools and select Discussion Board.
- The main Discussion Board page appears with a list of available discussion forums. A forum is an area where users discuss a topic or a group of related topics.
Alternatively, instructors may have turned off the Discussion Board link within Tools. In this case, the link to the Discussion Board will be located within a content area, such as Lessons. Instructors also may have a link directly in the course menu. If you are unable to locate a Discussion Board, please contact your instructor.
The Main Discussion Board Page
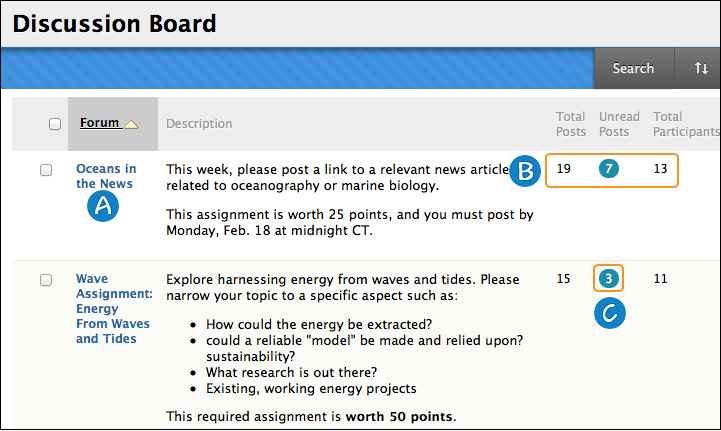
- Click a forum title to view the messages. Forums containing unread posts appear in bold.
- View data on the number of posts and participants.
- Click the number in the Unread Posts column for one-click access to a forum’s unread messages.
Course groups can have their own discussion boards. Group discussion boards are available only to users who are members of the group. If a group discussion board is available, access it from the groups link on the course menu or in the My Groups area.
Discussion Forum Views: List View and Tree View
After you click a forum title, a page loads displaying all forum threads. You can view the page in either List View or Tree View. This choice remains in effect until you change it, and you may change it at any time. On the forum page, in the upper-right corner, change the view.
![]()
List View
Click List View to present the threads in a table format. Thread titles in bold type contain unread posts.
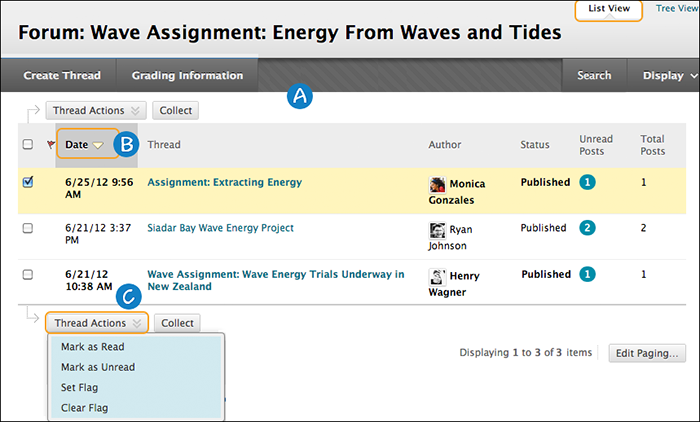
- From the action bar, you can create threads, collect, or search posts. If your instructor has allowed you to receive email alerts to new posts in the forum, you will also see Subscribe.
- To sort a column, click the column heading.
- Select the check box next to a thread and make a selection from the Thread Actions drop-down list. You can select multiple threads or select the check box in the header to select all threads. You can perform the following actions:
- Marking threads read or unread.
- Setting or clearing flags. Flags mark threads for later attention.
- Subscribing or unsubscribing for email alerts to new posts made to threads, if enabled.
Once you click a thread to open it, it will display the initial post as well as all replies to the post in one page. Please note, if all posts are posted under one initial post (made by the instructor) this page may take a while to load. It is recommended that you use Tree View.
Tree View
Click Tree View to show the thread starter messages and their replies. From the action bar, you can create threads or collect posts.
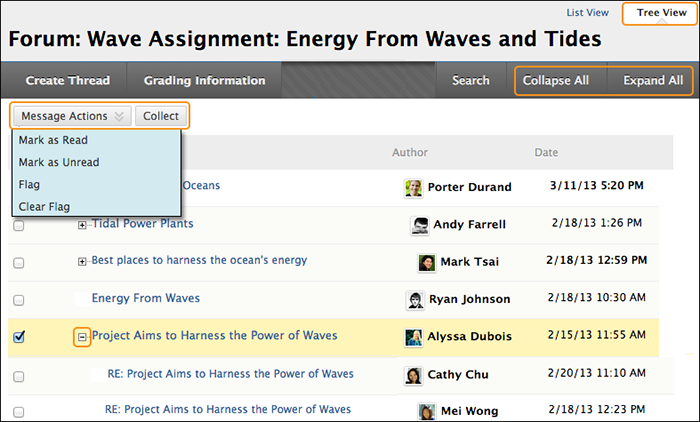
You can expand and collapse threads by using the plus and minus icons next to the titles. If a thread starter message contains unread posts, the thread starter title appears in bold type. On the action bar, use the Collapse All and Expand All options to hide or view all posts included in all threads.
Select a thread and make a selection from the Message Actions drop-down list on the action bar. You can select multiple threads or select the check box in the header to select all threads. Actions include marking threads read or unread and setting or clearing flags. Flags mark threads for later attention.
How to Create a Discussion Post
Forum settings control who can post, and what other types of actions you can take, such as editing your own threads, posting anonymously, or rating posts. Depending on which forum settings your instructor has selected, you may be allowed to create a new thread.
- Access a discussion forum and click Create Thread on the action bar.
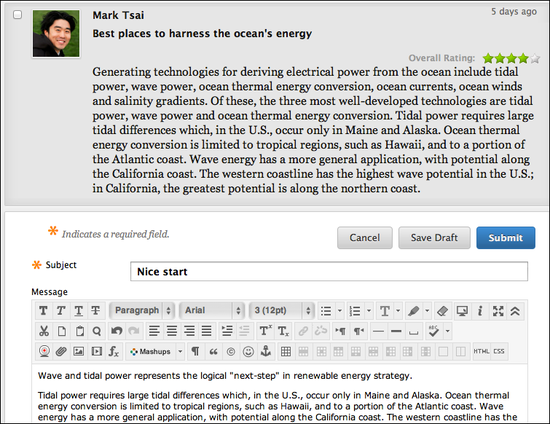
- On the Create Thread page, you can view the forum description to refer as you write your response. Type a Subject and Message. You can use the content editor functions to format the text and add files, images, web links, multimedia, and mashups.
- Alternatively, in the Attachments section, attach a file using one of the following options:
- To upload a file from your computer, click Browse My Computer.
- If your institution licenses content management, click Browse Content Collection.
- Click Save Draft to store a draft of the post or click Submit to publish your reply.
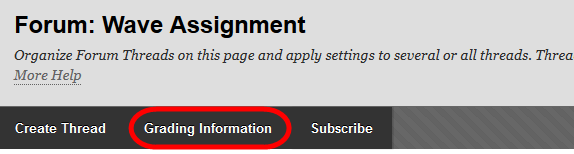
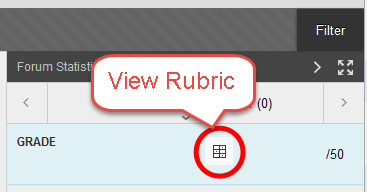
If your instructor has associated a rubric with the discussion forum or thread and made it available to students, you can view grading criteria before beginning work. Click Grading Information to access the forum or thread's Grade page. Click View Rubric.
Save a Post as a Draft to Submit Later
The Save Draft function is available if you need to return to your post at a later time. This function saves your comments and files on the page.
To access your post later, return to the forum page and point to Display to access the drop-down list. Select Drafts Only to view the saved post. While viewing your post, point to it to view the functions for Edit and Delete. When you click Edit, the content editor opens.
You can make edits, add or delete files, and use the functions in the content editor. Click Submit to publish the post.
How to Reply to Discussion Posts
You can reply to published threads, but cannot reply to locked or hidden threads.
- Access a forum and select a thread.
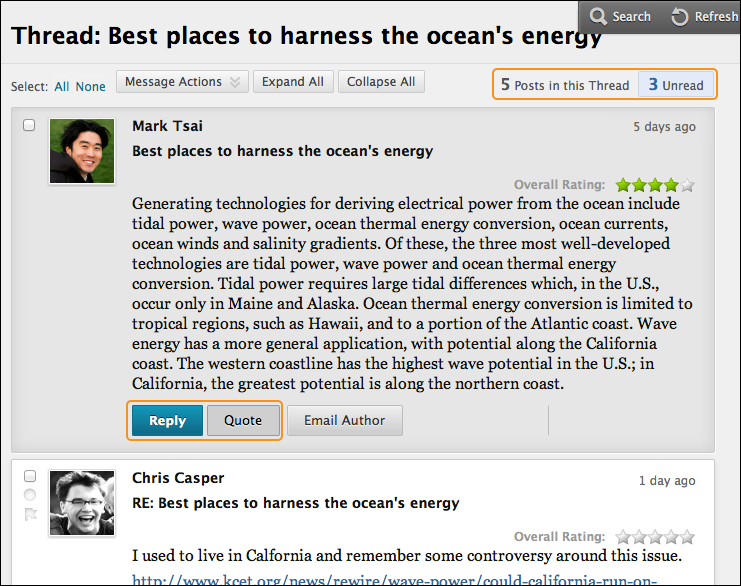
- On the thread page, you can view the text of the post and information, such as the author and posted date. All replies appear on the same page with the parent post.
- For the first post, click Reply. Point to the post to see Quote and Email Author. The Quote function includes the post's text as part of your reply. For other posts on the page, point to the message and Reply and the other functions appear.
If you want to view only the unread posts in the thread, click the unread link on the action bar. The unread posts appear on one page.
- The page expands below the post you are responding to, allowing you to view the post and access the content editor.
- If needed, edit the Subject. Provide your reply in the Message box. Optionally, use the content editor functions to format the text and include files, images, web links, multimedia, and mashups. Attachments you upload using the content editor can be launched in a new window and can include alternate text to describe the attachment.
Files uploaded by students are not saved to the course repository.
- Alternatively, following the Message box, attach a file using one of the following options:
- To upload a file from your computer, click Browse My Computer.
- If your institution licenses content management, click Browse Content Collection.
- Click Save Draft to store a draft of the post or click Submit to publish your reply.
On the thread page, your reply appears at the end of the list. If you attached a file, a paper clip icon appears next to the post's title. If you used the Insert/Edit Image function, the image appears with the text you provided.
View Discussion Board Grades
You can view your grades for your discussion contributions in My Grades. The discussion grade row can contain a symbol indicating its status, such as an exclamation mark indicating it needs grading. Or, if your post has been graded, the grade appears. To learn more, see My Grades
- On the course menu, select My Grades.
- On the My Grades page, to view more detail, click the link to see the post's Grade Forum page.
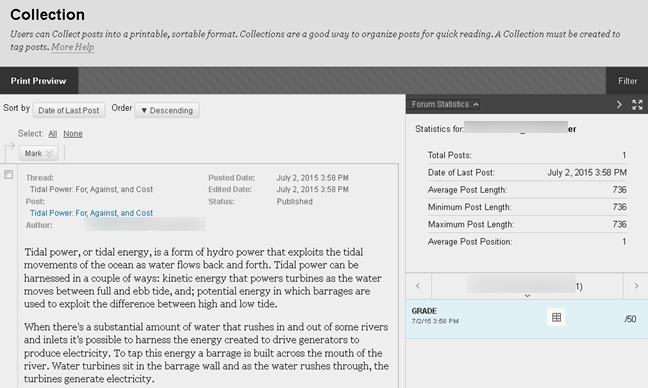
This page includes:
- Forum Statistics: This section shows information about your posts, such as Total Posts, Date of Last Post, Average Post Length, and Average Post Position.
- Forum Grade: This section provides information about your grade and any instructor's feedback. If your instructor used a rubric for grading, click View Rubric to display detailed grading information.
- Contributors: This section shows other users who participated in the forum.
Can't find your Discussion Board Post(s)?
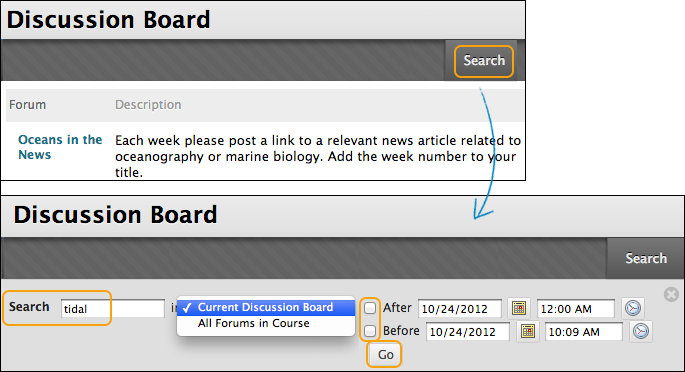
Search for your discussion board posts:
- Access the discussion board, a forum, or a thread.
- On the action bar, click Search. The Search field expands.
- Type a search criterion in the Search box.
- In the drop-down list, select an area to search:
- Current Discussion Board
- All Forums in Course
- Current Forum
- Current Thread
The options in the drop-down list depend on where your search began. All Forums in Course includes any group discussion boards in your course. Students do not see results from group discussion boards unless they are members of that group.
- To further narrow your search results, select the After and Before check boxes to enable the date and time selections. Type dates and times in the boxes or use the pop-up Date Selection Calendar and Time Selection Menu to select dates and times.
- Click Go.
On the Search Results page, you can read and print the results. On the action bar, click Print Preview to open the page in a new window in a printer-friendly format. Posts print in the order they appear on the page. To select which posts appear and in which order, you can filter and sort posts using the Filter function and the Sort By and Order drop-down lists on the action bar.
On this page, you can also reply to posts and mark messages read or unread. Click the Quote function to include the post's text as part of your reply. To view the responses to a post, click the post's hyperlinked title to navigate to the thread's page.